When dealing with Audio in Final Cut Pro, there are two primary filters that help our audio during video work. In this article I'm going to share some tips about them to increase the overall quality and value of your video production, in order of workflow. Remember, audio filters are only used to fix problems.
Balance Of Sources
Before I talk about filters, I'll mention three balance qualities I've learned from my work as a music composer and mixer. These will help reduce the need for filters.
Frequency Balance: audio sources must occupy different frequency spaces. For example, don't use two identical boomy, deep, heavy bass sources to start with or they will cancel each other.
Spacial Balance: be sure if your music clip occupies a wide stereo spread, your voices are mono, and your sound effects are spread between the left and right channels thus not competing for location, like actors on a stage.
Quality Balance: all of your audio clips should be of equal quality. One horrible quality audio clip will drag down the quality of all the others in the scene. I'd rather have all medium quality clips than great quality clips contrasting one horrible quality clip. They should sound like they come from the same place at the same time with the same acoustic qualities.
Noise Gate
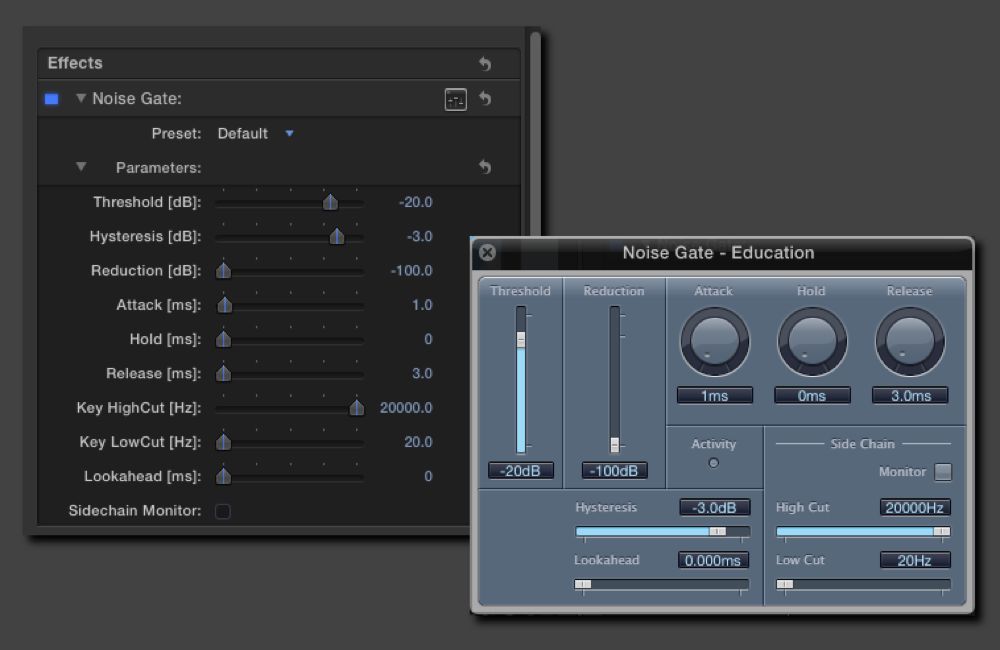
When I work with vocals, one of the first things I will reach for is a Noise Gate. This insures that no audio signal is heard below the set threshold, or volume level. Filling in ambient sound afterwards is OK if necessary. Open the Effects Browser, scroll down the left column to the Audio filters, to the Levels collection, in the Logic section find the Noise Gate. The Parameters section in the Inspector of many filters may intimidate you but they're handly for keyframing. Instead, look for the square icon filled with slider control images, to the far right of the filter's header (title bar, next to the curved arrow rest button). This button brings up a nicer user interface, and exists for the filters discussed here.
At its most basic, start by setting the Threshold to -40 for normally recorded voice work that peaks around -6 dB, Attack and Release to 20 ms each. I leave the rest at their defaults. Adjust the Threshold by small amounts if the voice gets cut off too much, or the noise is not cut off enough. If the background noise volume is too close to the voice volume, a Noise Gate will only make it sound worse.
Equalization
An Equalizer, or EQ, lowers overbearing frequencies in an audio clip so that they don't conflict with the same frequencies in other clips, or simply enhance the clip as a stand alone audio source. In the EQ collection of audio effects, find the Channel EQ in the Logic section.
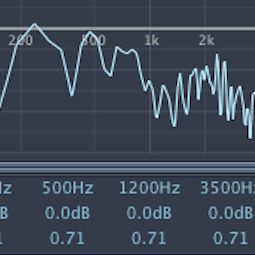
Turn on the Analyzer (left-hand side) and click the button below it to show pre EQ. This will show you the frequencies of your raw audio during playback. Always reduce the level of frequencies you do not want. Cut the frequencies that are strong, to allow the weaker, more desirable frequencies to be heard. For example, if a voice is nasal, but has crisp highs, pull some of the mid and high frequencies down, to allow the natural low end to come through.
Compression
In the Effects Browser you'll find Logic Pro's wonderful compressor in the Levels collection. It will limit how loud the loudest parts of an audio clip are and smooths out the overall perceived volume levels of a clip, letting the more quiet parts be heard better. Use it when you have loud parts and soft parts of an audio clip that are too extreme to deal by simply setting the Volume control.
Start by setting the Attack to about 10 ms and Release to about 30 ms. If you get too harsh of an edge on sounds, turn on the Auto button in this area. The Compressor Threshold you'll have to play with, but start with it at about -6 dB, and the Gain at -6 dB. The Threshold is when the compressor kicks in and starts to squeeze the loudness down. The Gain controls the overall output volume level. These should be easy to understand once you start to play with them.
Conclusion
I hope this article gives you a small insight into this very complex subject. Know that audiences process auditory information they (and you) are not consciously aware of. For more detailed information, watch the Logic Pro tutorial videos:


